The interface design of Reflex Solutions Pro is neat and clear and helps users produce individual solutions (individual products and product combinations) with complete documentation.
The individual programme functions in RSP each have their own, unique view. The app therefore has four clearly distinct views: home page functionality, design, configuring solutions and, finally, project management. This clarity of design is yet another reason why the app is so extremely user-friendly.
(Further information on the design of the home screen and the app icon is available in the Apps section.)
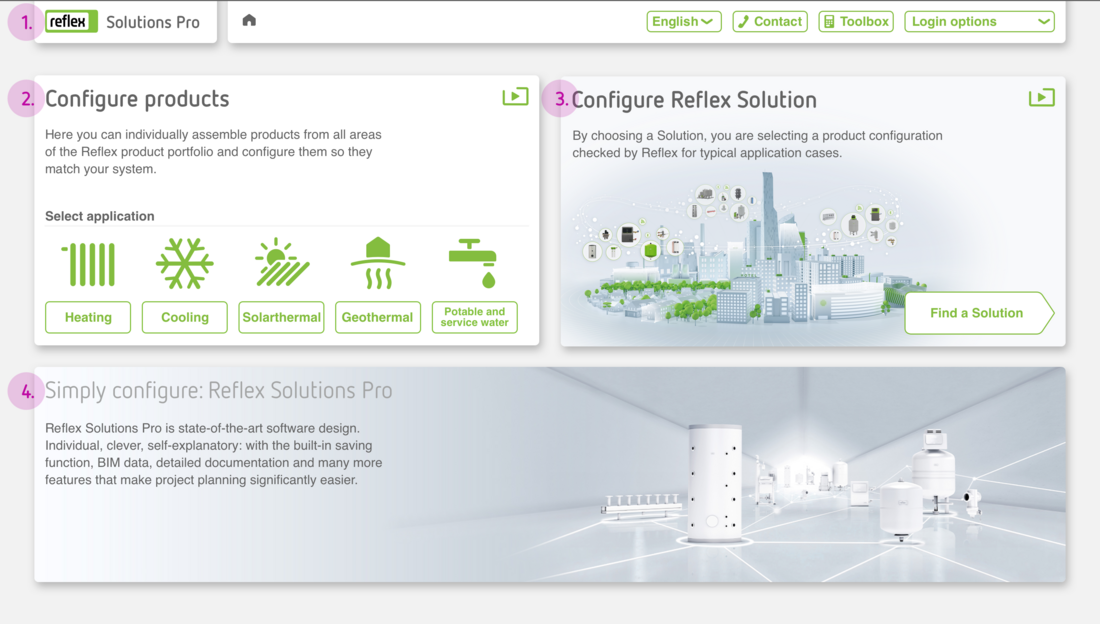
Home page
The home page shows the principle functions of the app at a glance.
1. Header
The header contains quick access to the choice of languages, contact, toolbox and login options. It is available at the top of the screen at all times while the app is in use. Further information on the design of the header is available in the sub-section Components in this section.
2. Design Reflex products
This area on the home page provides access to the design area for Reflex and Sinus products depending on the user’s area of application. The individual application options are illustrated with the Application area icons.
3. Design Reflex Solutions
This area on the home page provides access to the design area for Reflex Solutions. One click on this area and the user can start designing!
4. Marketing banner
This block displays various topics similar to the header on our website. We present new products, services and forthcoming events here. When designing graphics, please ensure that the important image content is set right-justified so that the text field does not overlap them.
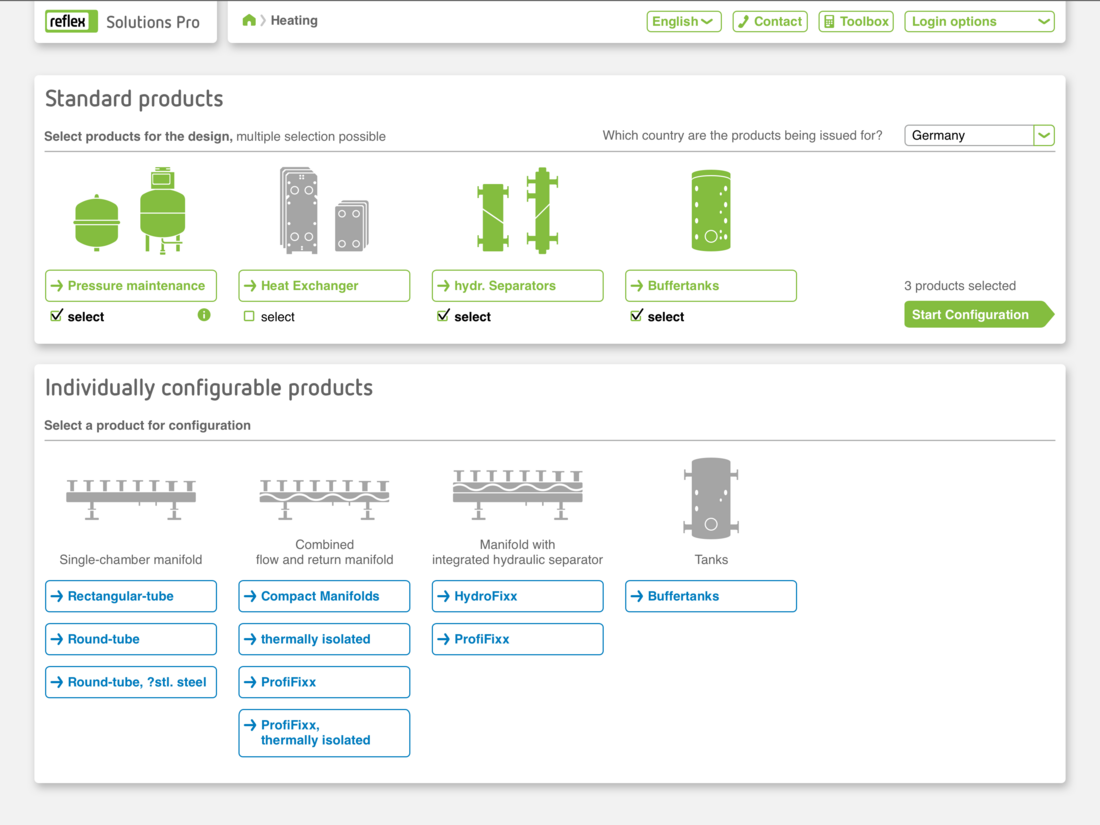
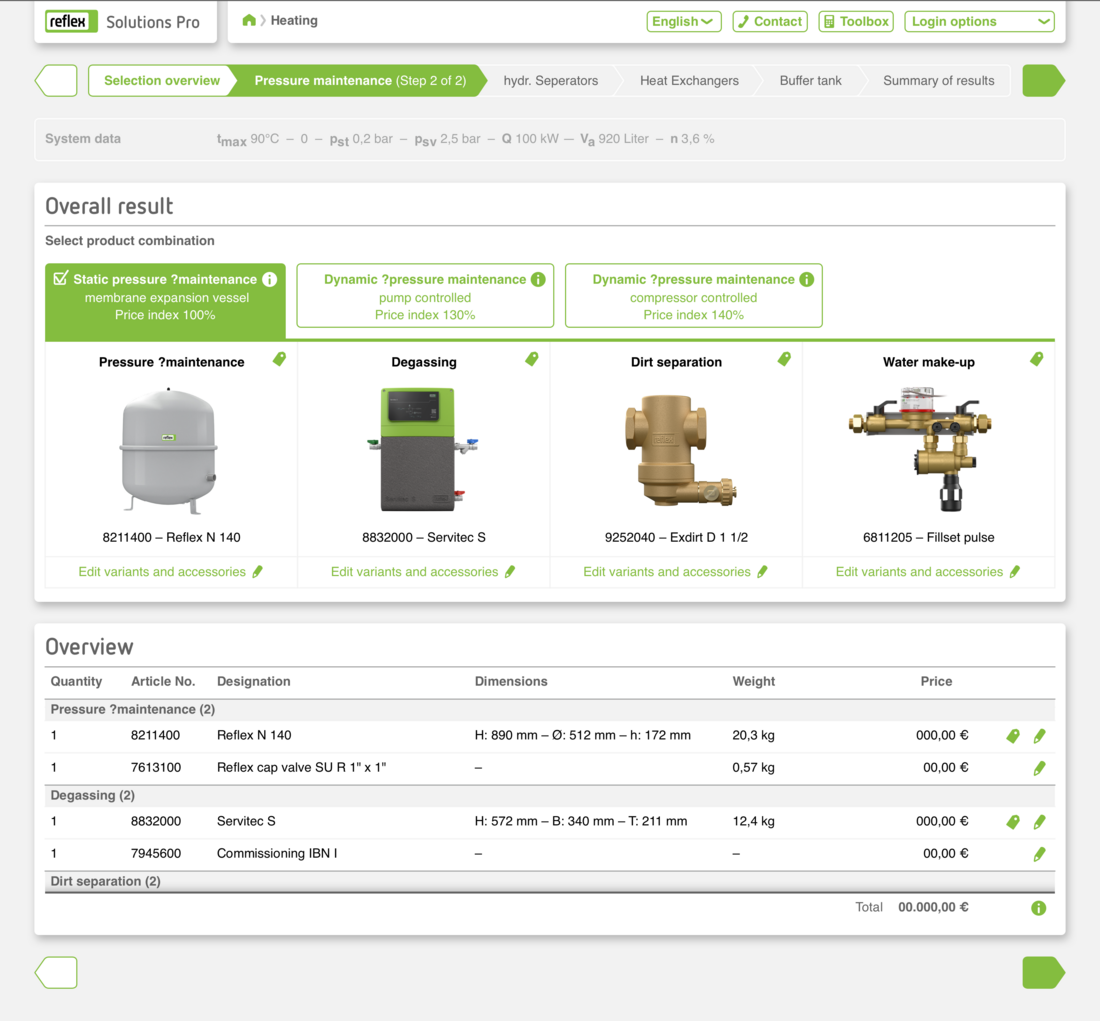
Design
1. Options
On this page, the user selects either one (or more) standard products or an individually configurable product. Information on illustrations for products or product lines are available in Illustrations. The screen comprises two striking colours: Reflex green and Sinus blue for Sinus products.
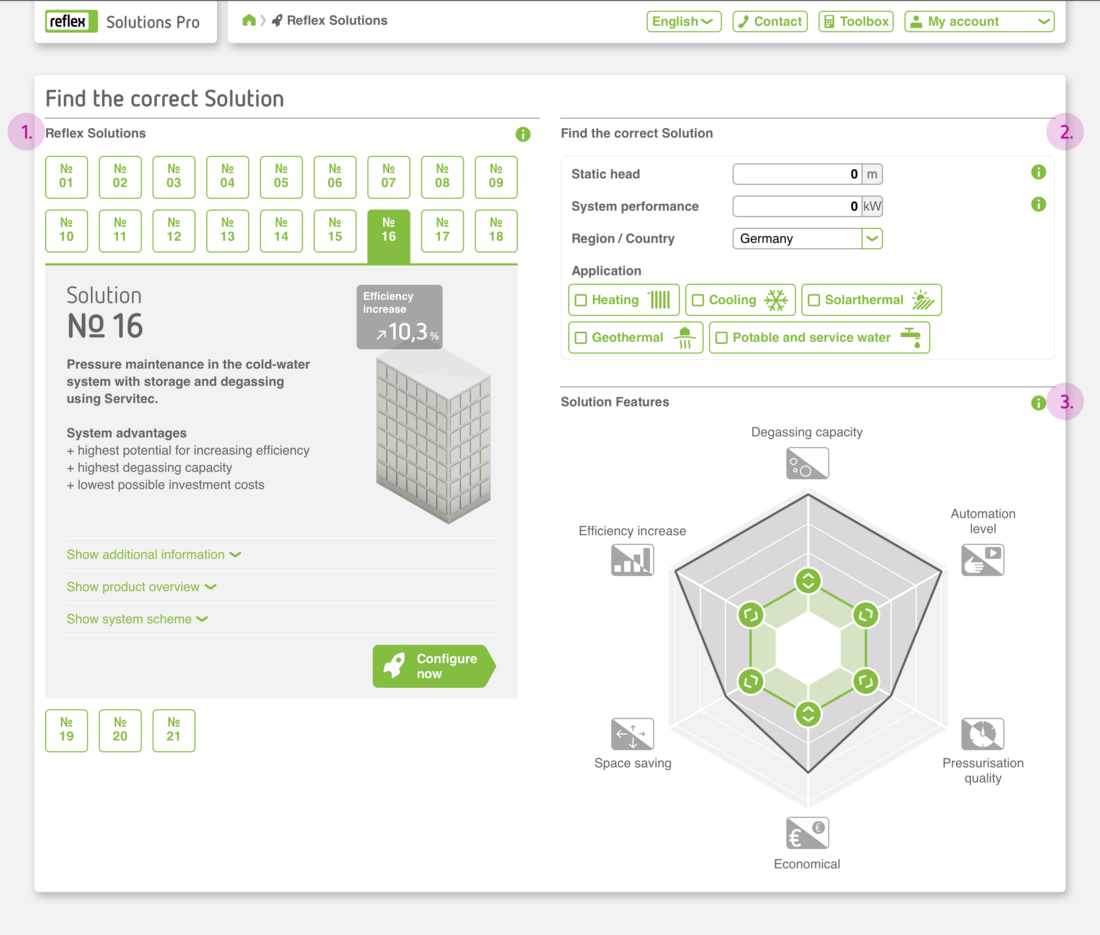
Reflex Solutions
1. Options menu for Reflex Solutions
On this page, the user selects his or her Reflex Solution using the appropriate tile. The tile unfolds and shows the essential elements of the solution. An icon indicates the next step ‘Design solution now’.
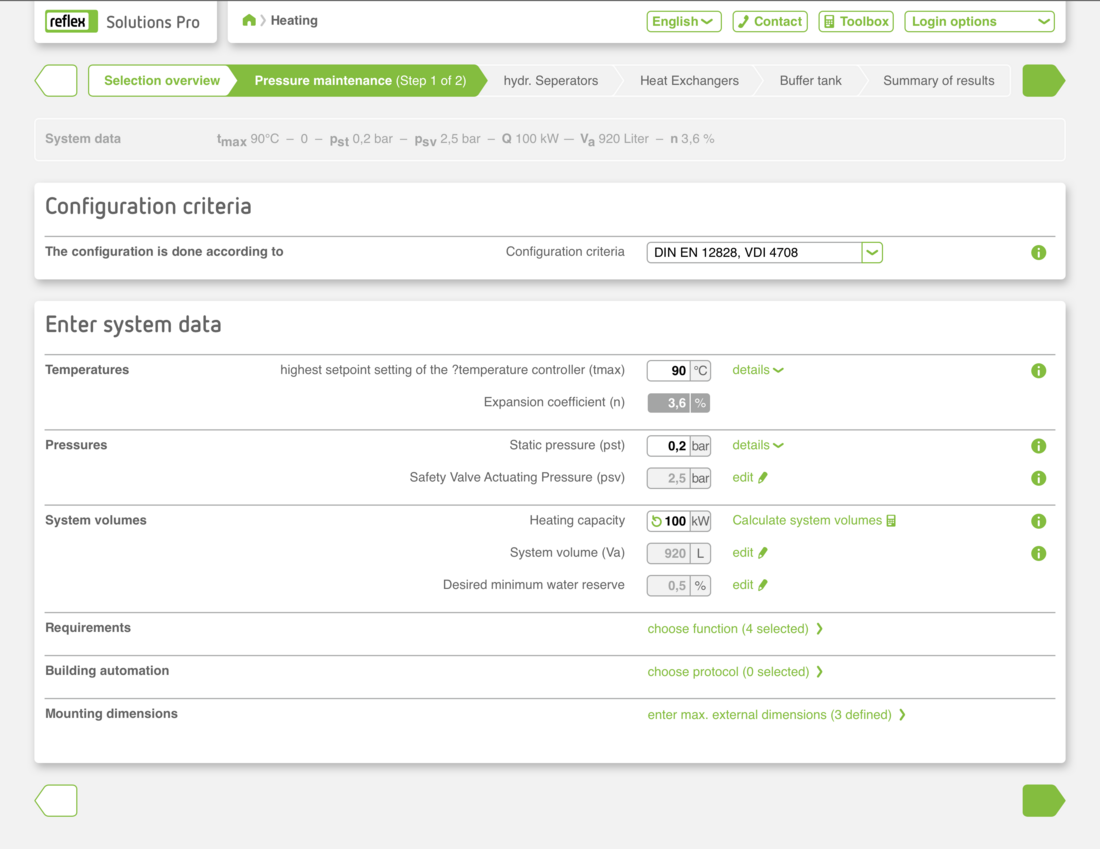
2. Entering basic technical data for system planning
This area contains filter options. And the user can enter the static height, system output and usage.
3. Choice of parameters using the solution radar
What are the most important parameters for this specific project? The user can filter in this area by favourite functions.
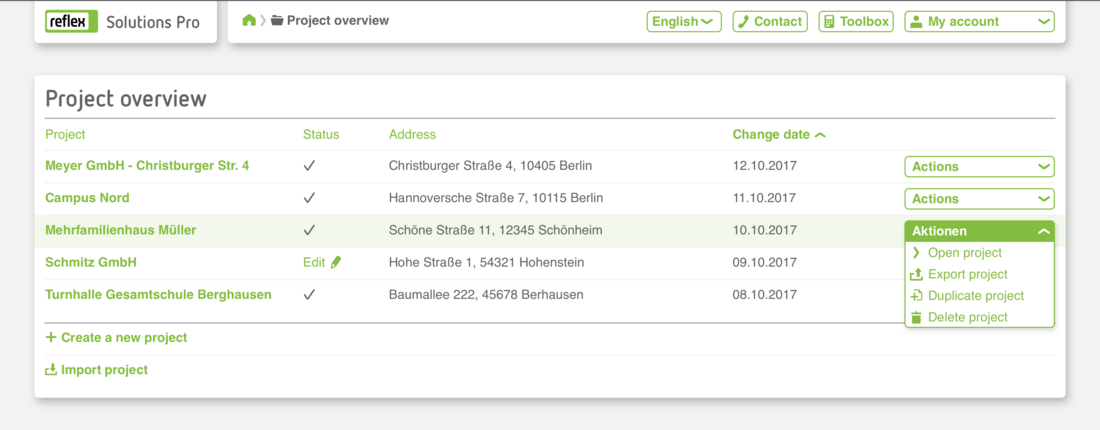
Project management
The Project Management screen shows registered users all their projects at a glance (completed designs or in progress). The project list can be sorted as required by title, status, address or date last modified. Each project has an actions button: the user can duplicate, export, edit or delete it. He or she can also import other projects here or start a new project design.